
| 일 | 월 | 화 | 수 | 목 | 금 | 토 |
|---|---|---|---|---|---|---|
| 1 | 2 | 3 | 4 | 5 | 6 | |
| 7 | 8 | 9 | 10 | 11 | 12 | 13 |
| 14 | 15 | 16 | 17 | 18 | 19 | 20 |
| 21 | 22 | 23 | 24 | 25 | 26 | 27 |
| 28 | 29 | 30 |
- ultralytics
- docker
- lightly
- GenAI
- 구글
- 영화
- DART
- 논문리뷰
- chatGPT
- Flutter
- image
- coding
- llm
- clone
- FunctionGemma
- 엔지니어
- Kubernetes
- 딥러닝
- Fultter
- 리뷰
- Type
- 야호
- 인공지능
- YOLO
- 파이썬
- container
- Gemma
- 클론코딩
- Python
- Ai
- Today
- Total
딥러닝 공부방입니다. 근데 이제 야매를 곁들인.
[Ultralytics Hub Flutter Clone Coding] #2. 홈 만들기 본문
저번 포스팅에서 사이드 메뉴를 만들었다.
이번에는 홈 화면을 구성해보려고 한다.
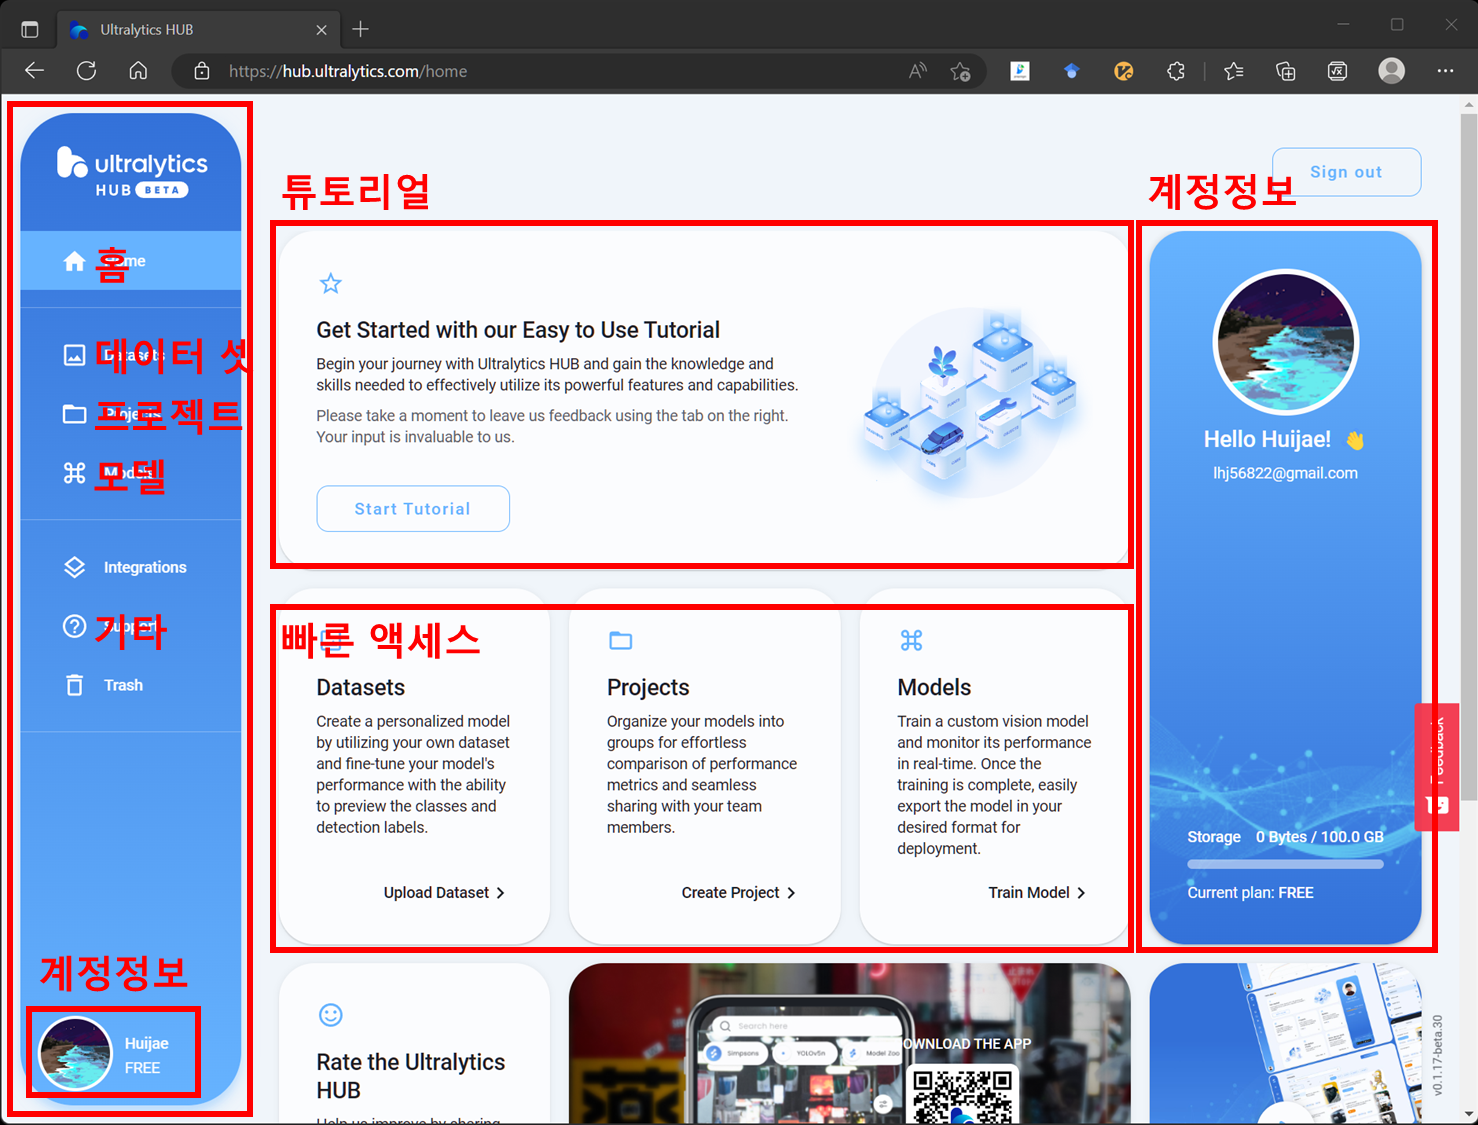
오른쪽 아이템들은 카드로 구성되어 있다.

5개의 위젯을 가지고 구성하면 될 것 같다.
밑에 빠른 액세스 카드는 이미지가 없기 때문에 이미지는 optional 로 두고
인자에 따라 layout 을 다르게 구성하면 될 것 같다.
Flutter 에서는 Card 위젯을 제공한다.
하지만 Card 위젯에는 사이즈를 지정하는 옵션이 없다.
찾아보니 SizedBox 라는 위젯이 있고 이를 사용해 Card를 감싸면
SizedBox 내의 사용가능한 공간 만큼 Card 가 expand 되어 표시되게 된다.


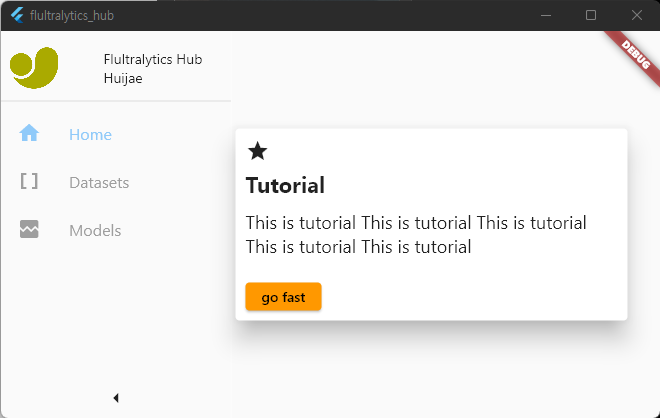
Card 의 Layout 을 생각해보자

최상단 Layout 은 Row 가 될 것이고
왼쪽에는 Column 을 사용하면 될 것 같다.
Column 에는 아이콘, 제목, 설명, 버튼 위젯을 차곡 차곡 쌓으면 될 것 같다.
오른쪽에는 이미지 소스를 준다면 출력하고 아니면 아무것도 생성하지 않도록 조건을 걸면 좋을 것 같다.
class CustomCard extends StatelessWidget {
  final IconData icon;
  final String title;
  final String subTitle;
  final double width;
  final double height;
  final String? buttonText;
  final Function? buttonHandler;
  final String? imageSrc;

  const CustomCard({
    required this.icon,
    required this.title,
    required this.subTitle,
    this.width = 400,
    this.height = 200,
    this.buttonText,
    this.buttonHandler,
    this.imageSrc,
    super.key,
  });
}
icon, title, subTitle 은 필수 인자로 설정하고 나머지는 optional 및 Nullable 로 지정하였다.
  @override
  Widget build(BuildContext context) {
    return SizedBox(
        height: height,
        width: width,
        child: Card(
          elevation: 20,
          child: Padding(
            padding: const EdgeInsets.all(10),
            child: Row(
              children: [
                Expanded(
                  flex: 10,
                  child: Column(
                    crossAxisAlignment: CrossAxisAlignment.start,
                    children: [
                      Icon(icon),
                      const Spacer(flex: 1),
                      Text(
                        title,
                        style: const TextStyle(
                          fontWeight: FontWeight.bold,
                          fontSize: 22,
                        ),
                      ),
                      const Spacer(flex: 2),
                      Text(
                        subTitle,
                        style: const TextStyle(
                          fontSize: 18,
                        ),
                      ),
                      if (buttonText != null) ...[
                        const Spacer(flex: 4),
                        ElevatedButton(
                          onPressed: () => buttonHandler ?? {},
                          child: Text(buttonText ?? ""),
                        )
                      ]
                    ],
                  ),
                ),
                if (imageSrc != null) ...[
                  const Spacer(flex: 1),
                  Image.network(
                    imageSrc ?? "",
                    width: 100,
                  )
                ]
              ],
            ),
          ),
        ));
  }
Flutter 의 layout 구성 방법이 꽤나 직관적이라고 생각했었는데
이렇게 놓고 보니 가독성이 좀 구린 것 같다. (제가 부족한 탓일 겁니다.)
어쨋든 이렇게 조건에 따라서 다른 뷰 세가지를 만들 수 있다.


하지만 텍스트가 길어지면 layout을 넘어가서 오류가 뜬다.

이를 해결하기 위해 누군가 이쁜 위젯을 만들어 공유해주셨다.
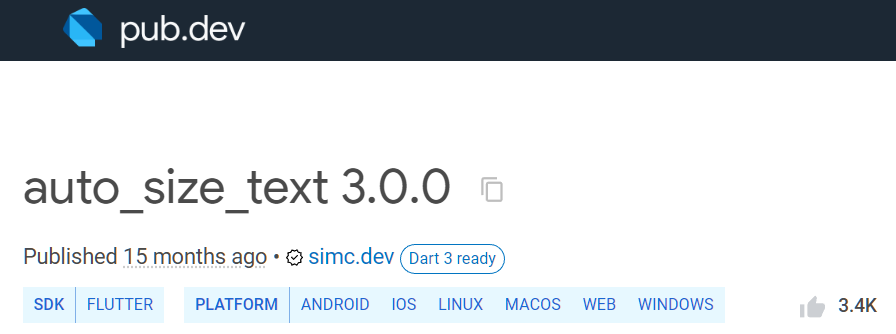

해당 위젯을 사용하니 가용 영역에 맞게 폰트 크기가 자동으로 조절되어 벗어나지 않게 되었다.
작성한 CustomCard 클래스를 사용해 홈을 구성했다.
